How to Install Drupal with Lando
We might not be taking a trip to Cloud City on Bespin to visit our old friend in charge of the gas mine… but if you're looking for a powerful and flexible way to develop your Drupal website locally, or simply to try Drupal and learn about it, using Lando is an excellent choice! Lando is an open-source, local development environment that simplifies the process of setting up and configuring applications. With Lando, you can create a local environment for Drupal that includes all necessary components like PHP, MySQL, and various tools, with minimal setup (and no development skills required). This guide will take you through the step-by-step process of installing Drupal with Lando.
Prerequisites
This guide uses the command line. Here are some instructions to get you started if you are not already familiar with the command line.
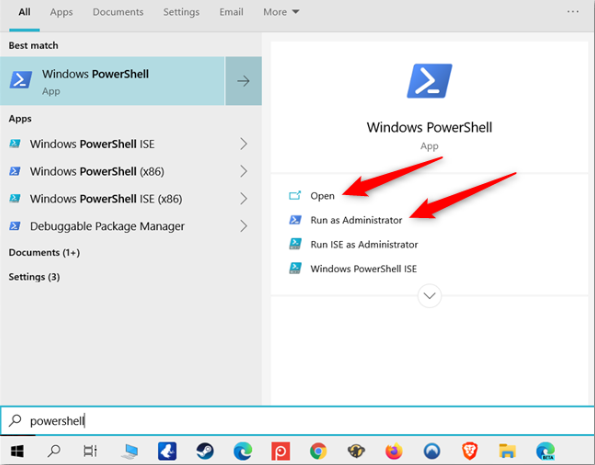
If you are on Windows, install PowerShell. You can open the prompt like this:
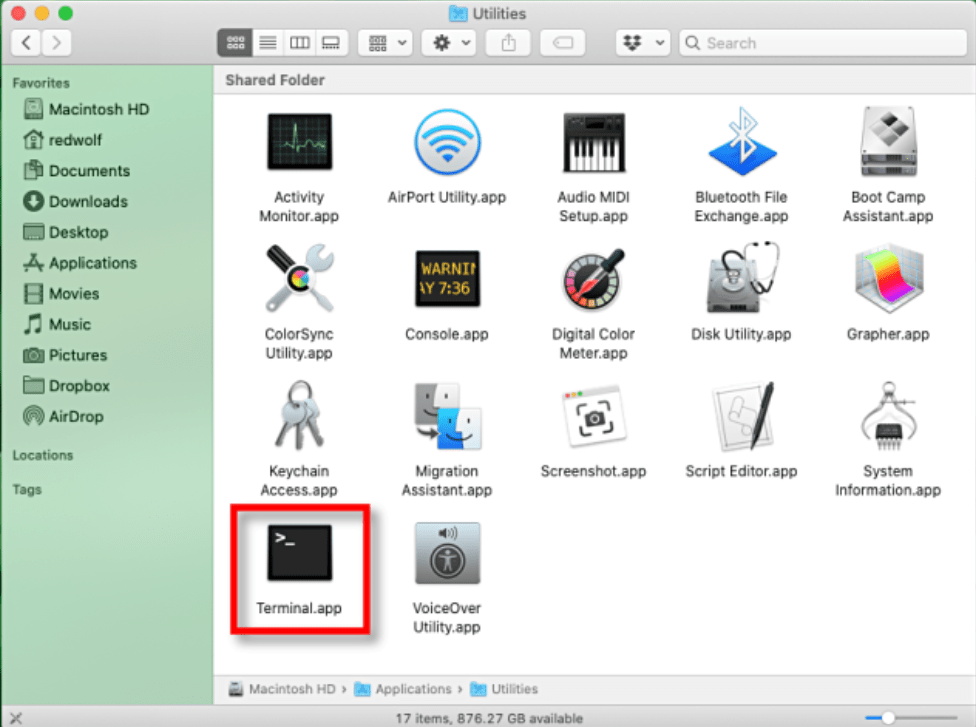
The terminal already comes installed on Mac Os:
You will need to use a text editor to go through this guide. Any text editor that comes with your Os will do, even good old Notepad, but to make things easier we recommend that you install Visual Studio Code, which works on all operating systems.
Next, install lando:
- You can download it from Lando's website.
- Windows and Mac users can skip this step, but Linux users will need Docker installed separately and running. You can download Docker from Docker’s website.
Step 1: Create a Project Directory
Start by creating a directory for your Drupal project. You can copy and paste each command directly in your terminal prompt. Open your terminal or command prompt and run the following two commands, one at a time:
mkdir my-drupal-sitecd my-drupal-site
Step 2: Initialize a Lando Drupal Project
Inside the project directory, initialize a new Lando project for Drupal. Lando offers pre-configured recipes for various platforms, including Drupal. Use the following command:
lando init --recipe drupal10 --source cwd --webroot web --name my-drupal-siteWhat all this sorcery means:
- --source cwd: This specifies the source of your codebase. For starting fresh without existing code, we specify cwd to indicate the current working directory as the source.
- --recipe drupal10: Specifies the Lando recipe to use. You can replace drupal10 with drupal9 or drupal8 based on your needs.
- --webroot web: Sets the webroot to the web directory, a standard location for Drupal projects.
- --name my-drupal-site: Names your project within Lando. You can replace this name with something relevant to your specific project.
Step 3: Start Your Lando Environment
Once the configuration is complete, start your Lando environment with:
lando startThis command will download all the necessary Docker containers and start up your development environment. The initial startup may take a few minutes as it downloads the required images.
Step 4: Download and Install Drupal
Now that your Lando environment is running, download and install Drupal. You can do this using Composer, which is pre-installed in the Lando environment. We will use the official Composer template for Drupal:
lando composer create-project drupal/recommended-project:10.* drupalThis command will download the Drupal codebase into a subfolder named "drupal", so you will need to move them to the root of your project, with the following two commands:
mv drupal/* drupal/.[!.]* .rmdir drupal
Step 5: Configure Database Settings
Next, you’ll need to tell Drupal about the database. Lando automatically provides a database for you when using the Drupal recipe. You can retrieve the database connection details by running:
lando infoNote the database credentials from the output. Typically, the database connection details will look like this:
creds: { database: 'drupal10', password: 'drupal10', user: 'drupal10' }
internal_connection: { host: 'database', port: '3306' }
Then, create a Drupal settings file named settings.php to include these credentials. You can do this by copying the default.settings.php file:
cp web/sites/default/default.settings.php web/sites/default/settings.phpOpen the web/sites/default/settings.php file with a text editor. If you are using Visual Studio Code to keep things simple like we recommend, things will looks like this:
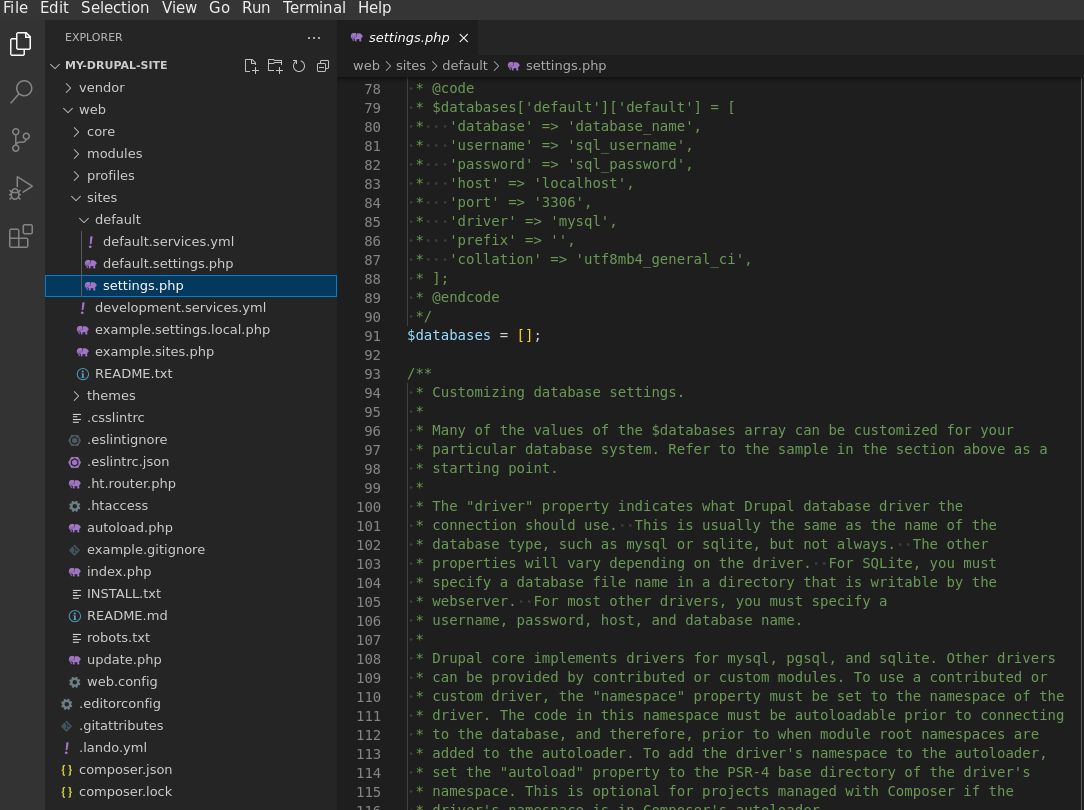
Then, find the database configuration section, which is usually towards the beginning of the file. It will look something like this:
$databases = [];Replace the existing database configuration array with the following snippet, ensuring it matches the credentials you retrieved from lando info:
$databases['default']['default'] = array (
 'database' => 'drupal10',
 'username' => 'drupal10',
 'password' => 'drupal10',
 'host' => 'database',
 'port' => '3306',
 'driver' => 'mysql',
 'prefix' => '',
);
Do not forget to save the file.
Step 6: Install Drupal via the Web Interface
With everything set up, you can now install Drupal by accessing the site from your browser. Let’s restart Lando to provide us with an URL for your Drupal site that you can access by running:
lando restartLook for the URL (e.g. my-drupal-site.lndo.site) in the output, then open this URL in your browser. Follow the installation steps provided by the Drupal installation wizard, providing site configuration details like the site name, admin username, and password. Once you’ve finished, Drupal should be installed and accessible locally!
Once you're done working on your site, you can stop the Lando environment with:
lando stopAnd when you're ready to work on your site again, navigate to the project directory and restart the environment by running:
lando startJust ensure you're in the correct project directory before using the lando start command to spin things back up!
If you need to start over from scratch or if you're finished working on the project and want to free up system resources, you can run:
lando destroyThis command will completely remove your Lando project, so beware before using it.
What if the URL does not load?
If the URL isn’t responding, make sure that you configured the database settings in the settings.php file, not the default.settings.php file. It’s also possible that the .lando.yml file is either misconfigured or non-existent. In that case:
1- Confirm the existence of the .lando.yml file on your site’s directory:
cd my-drupal-sitels -a2- This command lists all files, including hidden ones. If the .lando.yml file is not in the directory, it won’t appear in this list. If you see it listed, then you’re in the right directory and can skip to step 3, but if not, proceed with creating it:
touch .lando.yml3- Edit the .lando.yml file using Visual Studio Code or another text editor:
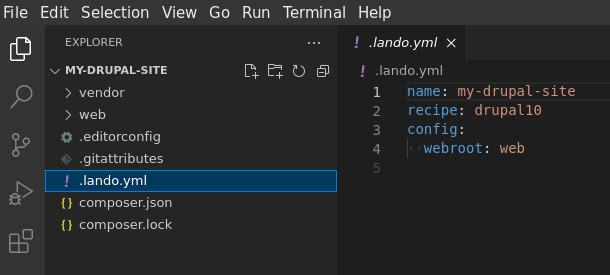
4- Add or correct the following configuration:
name: my-drupal-site
recipe: drupal10
config:
 webroot: web
 database: mariadb:10.5
5- After you’ve saved the .lando.yml file, you’ll need to restart the Lando environment to apply the changes:
lando rebuild -yWith the .lando.yml file set up, Lando should now recognize the configuration and you should be able to proceed with the Drupal installation as described in step 6!
Installing Drupal with Lando will give you a fully functional environment without the hassle of configuring each component manually. You can focus more on building and customizing your Drupal site and less on the intricacies of local server management. Try it out, and experience a more efficient development workflow. And if you're ready to take your Drupal site to the next level, contact Monarq for expert guidance and support.


